Managing a project in Jira can come with a ton of what ifs. “What if a high priority issue falls through the cracks?” ”What if I could auto-assign issues based on conditions I set?” “What if I could free up my team to focus on what matters most?” Well, what if you had the power to do something about all those what ifs? Now you do. Jira automation is a powerful automation engine that helps you and everyone within your org spends less time thinking about the ‘what ifs’ and more time focusing on ‘what’s next’. Like what if, instead of manually closing all sub-tasks when the parent closes, automation does it all for you? Or what if you could automatically notify a specific dev team via Slack or email when there is an issue that needs attention? It’s all possible with automation.
What is Jira Automation?
Jira automation is used to automate processes and tasks with just a few clicks. It provides a huge template library that you can just pick and use for automation which will save a lot of your time.
All you need to do is create your if/then rule in the drag and drop rule builder and you are all set. No technical experience is required. Even better, automation works across Jira products, so you can link issues across multiple Jira Software and Service Desk projects. From reducing manual tasks to faster incident resolutions, automation will help you spend less time dealing with the what ifs and more time on what’s next.
Atlassian did a survey of all their existing customers and got hundreds of responses back, and some of the stats that came out were 97% of customers said Jira automation saves time, 94% said Jira automation makes life easier, and 87% said automation helps scale Jira.
Jira Automation Building Blocks
It is just like Lego blocks or building blocks, all you do is take these blocks and put them together in different ways to craft your automation rules.
- So, in Jira automation, the first building block is going to be the trigger. A trigger is what kicks off the rule for an event in Jira.
- Secondly, we are going to add a condition, and the condition is just what refines the rule, simple as that. It adds power, and it refines.
- And then lastly, we have our action that is what executes the rules. So, we have got tons of actions to choose from. With automation in Jira, it isn’t like there are only a hundred use cases it solves, it is practically limitless.
Now, let’s see how to use Jira automation practically.
How does Jira Automation work?
So, to start automating a project, all you have to do is navigate to the project settings and then locate the project automation admin section, and this is really where all the automation rules for the project are created. Let’s jump into the demo and create our first automation rule.
So, this demo rule that I am going to create in this article is a really simple use case, which is adding some subtasks to an issue that has just been created.
The first thing I need to do is jump into our rule builder, and then I get to pick our first building block, so I need to pick a trigger for this rule. And with triggers, there is a lot of different choices available.
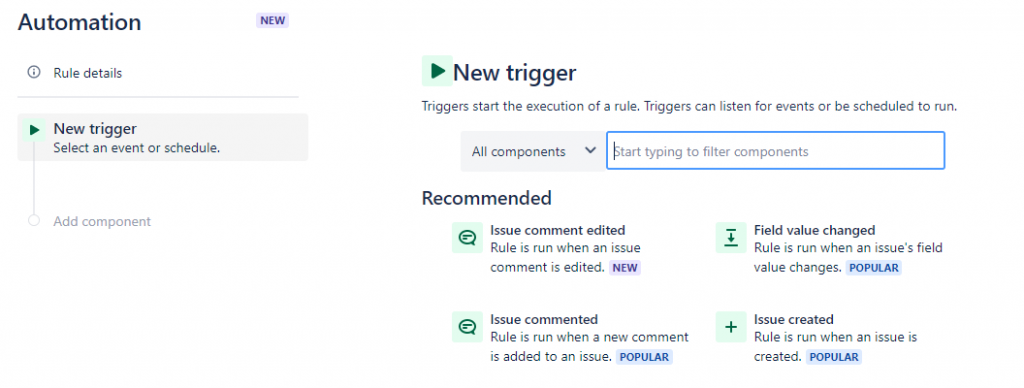
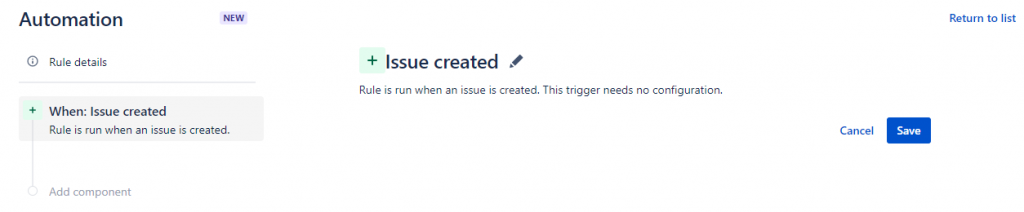
For this rule, I simply want to kick off when an issue has been created, so I can just pick the “issue created” trigger, and with this trigger, it is really easy, no extra configuration required. Once the trigger is ready, I can just save it.
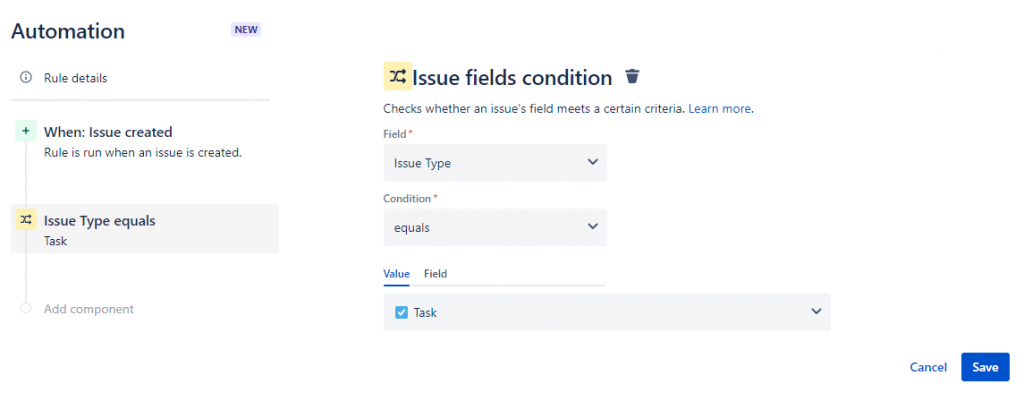
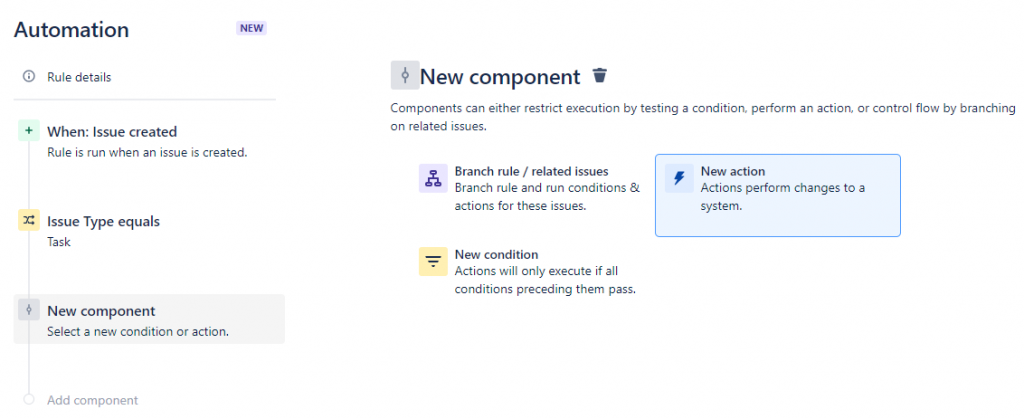
And now, we can add our next building block to this rule. So, with this rule, I am going to add a condition, and with conditions again, there is quite a bit of choice available. For this example, let’s just pick the issue field condition. Right now, all I want to check is that the issue type is a task. So only when a task is created, then I want to create subtasks.
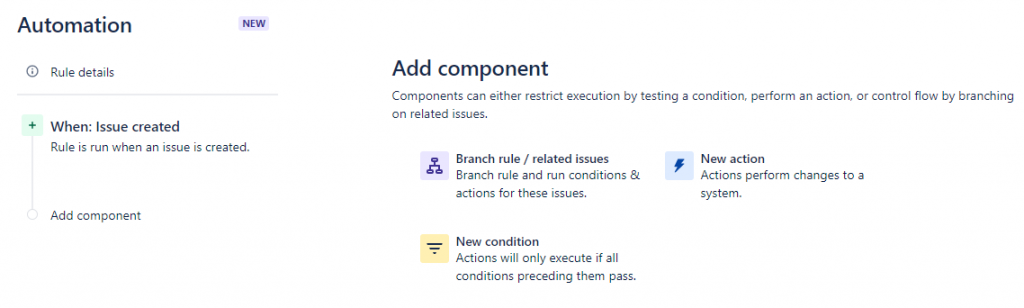

While I add everything on the right side, you get a nice visual summary as you go on the left hand side of what this rule does.
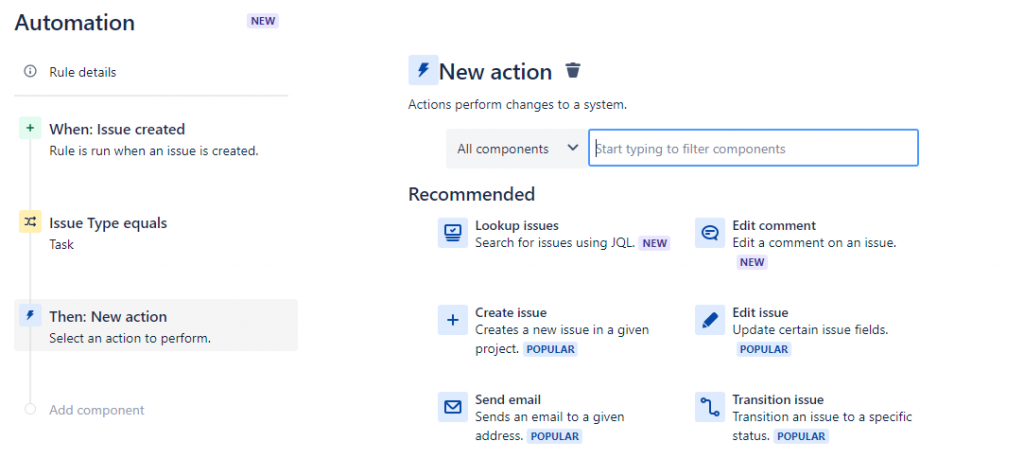
So now that I have created our condition, I can now go ahead and add our first action. And with actions, there is also a lot of choices available. You can assign issues, you can comment on issues, you can transition them, you can edit them, you can also create new issues in other projects or the same project. Jira also has a bunch of third-party integrations. So, you can send emails, or you could send a slack message using Jira automation. For this example, all I want to do is actually create some subtasks. So, we have a create subtasks action specifically for this use case, and I can just go ahead and add a few subtasks to this new issue that I just created.
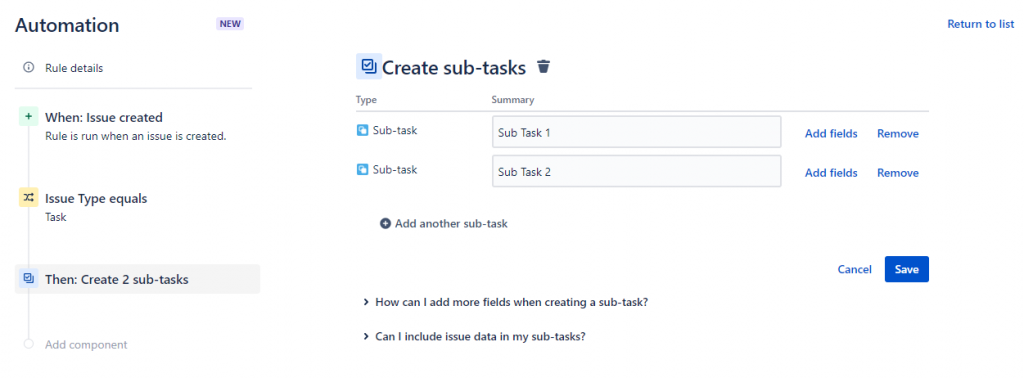
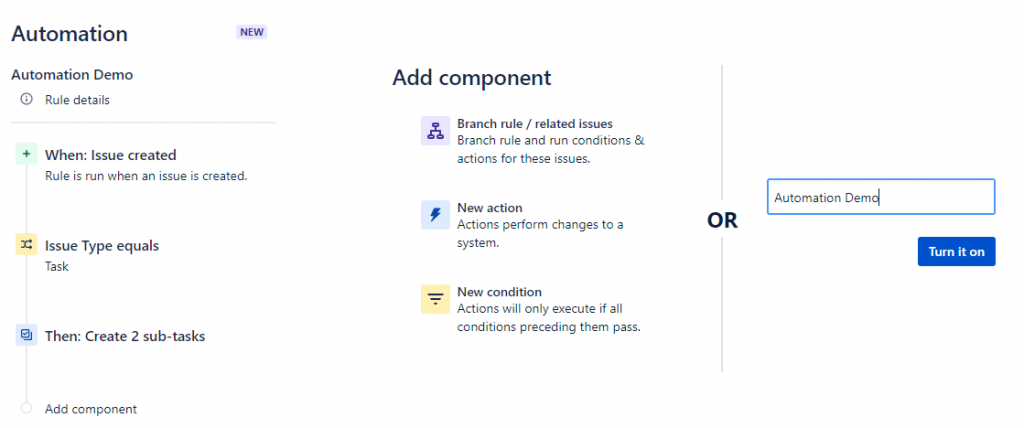
In this demo, that is pretty much all that I wanted to do with this rule. So, let’s just go ahead and give this rule a name, and then we can turn it on. That’s it, and the Jira automation is ready. When an issue is created, automatically Jira automation will create sub-tasks for that issue.
Final Thoughts
That was all you needed to know about Jira automation to get started. Jira automation is an amazing tool that can help you automate many tasks by just clicking a few buttons. You just need to go to automation settings, create a rule, select a trigger, select a condition, and finally choose an action, and the automation rule will be ready. So go ahead and start adding simple automation to your Jira projects.
