One of the most important features of akka.NET is the possibility to distribute actors over multiple machines. This allows us to easily scale our system with minimal effort. In the following post I will go through the process of implementing a simple peer-peer system where the actors as distributed over multiple machines.
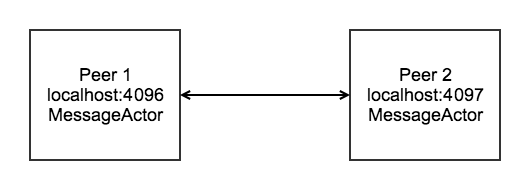
The following is a depiction of the system we wanted to implement. We are implementing two actor systems Peer 1 and Peer 2 located on different ports 4096 and 4097 respectively. Each will host a MessageActor.
First thing that we need to do is to include the akka.Remote nuget package.
[code]
Install-Package Akka
Install-Package Akka.Remote
[/code]
Next we need to define our HOCON configration. If you are new to HOCON follow the following short overview.
The following are the entries we need to add in our app.config.
[code]
<!– Add definitions for Akka Configuration Section–>
<configSections>
<section name="akka" type="Akka.Configuration.Hocon.AkkaConfigurationSection, Akka" />
</configSections>
[/code]
Next we define the HOCO configuration.
[code]
<akka>
<hocon>
<![CDATA[
akka
{
actor
{
provider = "Akka.Remote.RemoteActorRefProvider, Akka.Remote"
}
remote
{
helios.tcp
{
port = 4096</div>
hostname = localhost</div>
}
}
}
]]>
</hocon>
</akka>
[/code]
The remote section in this HOCON configuration, describes the transport that we are gonna use. Helios is the socket server that comes with akka.NET remote. Here the actor will be listening on port 4096.
Each actor is identified by its path.
akka.tcp://Peer1@localhost:4096/user/MessageActor
akka.tcp is the protocol section which defines the scheme, which is tcp in our case.
Peer1 is the name of our actor system.
localhost:4096 represent the inbound address that we represented in our configuration section.
MessageActor is the name of our actor.
Next we implement our actor
[code]
public class MessageActor : TypedActor, IHandle<string>
{
public ChatActor() {}
public void Handle(string message){
Console.WriteLine(message);
}
}
[/code]
Now implement the full application.
[code]
try
{
using (var actorSystem = ActorSystem.Create("Peer1"))
{
var localActor = actorSystem.ActorOf(
Props.Create<MessageActor>(), "MessageActor");</div>
var remoteActor = actorSystem.ActorSelection(
"akka.tcp://Peer2@localhost:4097/user/MessageActor");
if (remoteActor != null)
{
string line = "";
while (line != null)
{
line = Console.ReadLine();
remoteActor.Tell(line);
}
}
else
{
Console.WriteLine("Could not get remote actor ref");
Console.ReadLine();
}
}
}
catch(Exception ex)
{
Console.WriteLine(ex);
}
[/code]
and we are done. Make sure that each Actor system is using a different port and connecting to the counterpart.
Remoting is an important aspect of akka.net as it allows us to distribute work load on multiple machines allowing us the spread the load and scale. Also important to note that using akka.net we can focus on the business logic and use the underlying scaffolding to transport our messages to the different actors.
I hope you enjoyed this post. In the next post I will cover the concept of remote deployment of actors on remote systems.
If you need assistance or consultancy feel free to contact me on [email protected].
